
一、部署环境
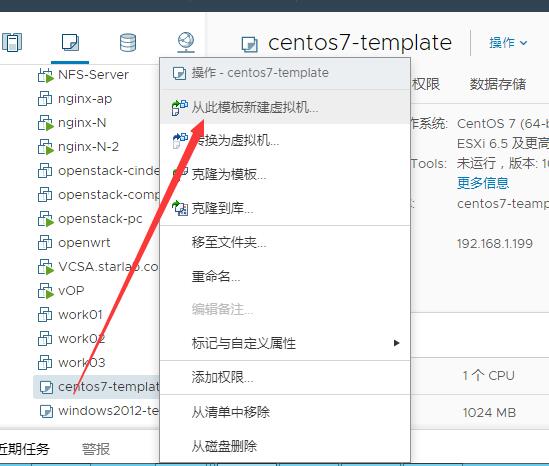
先克隆两台centos7的虚拟机
主机名:haproxykeepalived-3、4
关闭防火墙、selinux
1.haproxy部署(两台同步进行)
 安装依赖
 [root@haproxykeepalived-3 ~]# yum install wget gcc gcc+ -y
 安装编译包
 [root@haproxykeepalived-3 ~]# wget http://192.168.1.235/haproxy-1.5.14.tar.gz
 [root@haproxykeepalived-3 ~]# tar -zxvf haproxy-1.5.14.tar.gz
 [root@haproxykeepalived-3 ~]# cd haproxy-1.5.14
 [root@haproxykeepalived-3 ~]# make TARGET=linux26 ARCH=x86_64
 [root@haproxykeepalived-3 ~]# make install SBINDIR=/usr/sbin/ MANDIR=/usr/share/man/ DOCDIR=/usr/share/doc/
 创建启动脚本
 [root@haproxykeepalived-3 ~]# cat /etc/init.d/haproxy
 #!/bin/sh
 #
 # haproxy
 #
 # chkconfig:   - 85 15
 # description:  HAProxy is a free, very fast and reliable solution \
 #               offering high availability, load balancing, and \
 #               proxying for TCP and  HTTP-based applications
 # processname: haproxy
 # config:      /etc/haproxy/haproxy.cfg
 # pidfile:     /var/run/haproxy.pid

 # Source function library.
 . /etc/rc.d/init.d/functions

 # Source networking configuration.
 . /etc/sysconfig/network

 # Check that networking is up.
 [ "$NETWORKING" = "no" ] && exit 0

 exec="/usr/sbin/haproxy"
 prog=$(basename $exec)

 [ -e /etc/sysconfig/$prog ] && . /etc/sysconfig/$prog

 cfgfile=/etc/haproxy/haproxy.cfg
 pidfile=/var/run/haproxy.pid
 lockfile=/var/lock/subsys/haproxy

 check() {
     $exec -c -V -f $cfgfile $OPTIONS
 }

 start() {
     $exec -c -q -f $cfgfile $OPTIONS
     if [ $? -ne 0 ]; then
         echo "Errors in configuration file, check with $prog check."
         return 1
     fi

     echo -n $"Starting $prog: "
     # start it up here, usually something like "daemon $exec"
     daemon $exec -D -f $cfgfile -p $pidfile $OPTIONS
     retval=$?
     echo
     [ $retval -eq 0 ] && touch $lockfile
     return $retval
 }

 stop() {
     echo -n $"Stopping $prog: "
     # stop it here, often "killproc $prog"
     killproc $prog
     retval=$?
     echo
     [ $retval -eq 0 ] && rm -f $lockfile
     return $retval
 }

 restart() {
     $exec -c -q -f $cfgfile $OPTIONS
     if [ $? -ne 0 ]; then
         echo "Errors in configuration file, check with $prog check."
         return 1
     fi
     stop
     start
 }

 reload() {
     $exec -c -q -f $cfgfile $OPTIONS
     if [ $? -ne 0 ]; then
         echo "Errors in configuration file, check with $prog check."
         return 1
     fi
     echo -n $"Reloading $prog: "
     $exec -D -f $cfgfile -p $pidfile $OPTIONS -sf $(cat $pidfile)
     retval=$?
     echo
     return $retval
 }

 force_reload() {
     restart
 }

 fdr_status() {
     status $prog
 }

 case "$1" in
     start|stop|restart|reload)
         $1
         ;;
     force-reload)
         force_reload
         ;;
     check)
         check
         ;;
     status)
         fdr_status
         ;;
     condrestart|try-restart)
         [ ! -f $lockfile ] || restart
         ;;
     *)
         echo $"Usage: $0 {start|stop|status|restart|try-restart|reload|force-reload}"
         exit 2
 esac
 授权启动脚本
 [root@haproxykeepalived-3 ~]# chmod +x /etc/init.d/haproxy
 新建haproxy程序目录
 [root@haproxykeepalived-3 ~]# mkdir /etc/haproxy
 [root@haproxykeepalived-3 ~]# mkdir /var/lib/haproxy
 新建haproxy用户
 [root@haproxykeepalived-3 ~]# useradd -r haproxy
 写入haproxy配置文件
 [root@haproxykeepalived-3 ~]# cat /etc/haproxy/haproxy.cfg
 global

     log         127.0.0.1 local2
     chroot      /var/lib/haproxy
     pidfile     /var/run/haproxy.pid
     maxconn     4000
     user        haproxy
     group       haproxy
     daemon
     stats socket /var/lib/haproxy/stats

 defaults
     mode                    tcp
     log                     global
     option                  dontlognull
     option                  redispatch
     retries                 3
     timeout http-request    10s
     timeout queue           1m
     timeout connect         10s
     timeout client          1m
     timeout server          1m
     timeout http-keep-alive 10s
     timeout check           10s
     maxconn                 600

 listen stats
     mode http
     bind :8888
     stats enable
     stats hide-version
 stats uri     /status
     stats realm   Haproxy\ Statistics
     stats auth    admin:admin

 frontend  main
 bind 0.0.0.0:3306
     default_backend             mysql

 backend mysql
     balance     leastconn
     server mysql1 192.168.1.159:3306 check port 3306 maxconn 300      #两台MySQL的DB
         server mysql2 192.168.1.160:3306 check port 3306 maxconn 300
 修改rsyslog.conf配置文件

 [root@haproxykeepalived-3 ~]# cat /etc/rsyslog.conf
 ......
 #### MODULES ####
 # Provides TCP syslog reception  #去掉下面两项的#注释
 $ModLoad imtcp
 $InputTCPServerRun 514
 local2.*             /var/log/haproxy.log   #增加这句
 .......
 启动Haproxy服务
         [root@haproxykeepalived-3 ~]# systemctl start haproxy
         [root@haproxykeepalived-3 ~]# ps -A |grep haproxy     #查看服务状态
2.Keepalive部署 (两台同步进行)
 安装依赖
 [root@haproxykeepalived-3 ~]# yum -y install openssl openssl-devel
 安装编译包
 [root@haproxykeepalived-3 ~]# wget http://192.168.1.235/keepalived-1.2.19.tar.gz
 [root@haproxykeepalived-3 ~]# tar -zxvf keepalived-1.2.19.tar.gz
 [root@haproxykeepalived-3 ~]# cd keepalived-1.2.19
 [root@haproxykeepalived-3 ~]# ./configure --prefix=/usr/local/keepalived  --sbindir=/usr/sbin/ --sysconfdir=/etc/ --mandir=/usr/local/share/man/ --with-kernel-dir=/usr/src/kernels/2.6.32-504.el6.x86_64/
 [root@haproxykeepalived-3 ~]# cp /etc/keepalived/keepalived.conf /etc/keepalived/keepalived.conf.bak
 [root@haproxykeepalived-3 ~]# cat /etc/keepalived/keepalived.conf    #192.168.1.180是VIP地址
 [root@haproxykeepalived-3 ~]# cat /etc/keepalived/keepalived.conf  #Master节点的priority值比backup节点的高
 ! Configuration File for keepalived
 global_defs {
         notificationd LVS_DEVEL
 }

 vrrp_script chk_haproxy {
     script "/etc/keepalived/chk.sh"
     interval 2
 }

 vrrp_instance VI_1 {
     state MASTER
     nopreempt
     interface ens192
     virtual_router_id 10
     priority 130

     advert_int 1
     authentication {
         auth_type PASS
         auth_pass asd
     }
     virtual_ipaddress {
         192.168.1.180
     }
     track_script {
         chk_haproxy
     }

     notify_backup "/etc/init.d/haproxy restart"
     notify_fault "/etc/init.d/haproxy stop"
 }


 [root@haproxykeepalived-4 ~]# cat /etc/keepalived/keepalived.conf   #backup节点
 ! Configuration File for keepalived
 global_defs {
         notificationd LVS_DEVEL
 }

 vrrp_script chk_haproxy {
     script "/etc/keepalived/chk.sh"
     interval 2
 }

 vrrp_instance VI_1 {
     state BACKUP
     nopreempt
     interface ens192
     virtual_router_id 10
     priority 120

     advert_int 1
     authentication {
         auth_type PASS
         auth_pass asd
     }
     virtual_ipaddress {
         192.168.1.180
     }
     track_script {
         chk_haproxy
     }

     notify_backup "/etc/init.d/haproxy restart"
     notify_fault "/etc/init.d/haproxy stop"
 }
 创建脚本文件
 [root@haproxykeepalived-3 ~]# vi /etc/keepalived/chk.sh
 #!/bin/bash
 #
 if [ $(ps -C haproxy --no-header | wc -l) -eq 0 ]; then
        /etc/init.d/keepalived stop
 fi
 授予脚本执行权限
 [root@haproxykeepalived-3 ~]# chmod +x /etc/keepalived/chk.sh
 启动keepalived服务
  [root@haproxykeepalived-3 ~]# systemctl start keepalived
 [root@haproxykeepalived-3 ~]# systemctl enable keepalived
原创文章,作者:admin,如若转载,请注明出处:https://www.starz.top/2021/01/11/blog-db%e9%ab%98%e5%8f%af%e7%94%a8%e5%ae%9e%e6%96%bd/
相关推荐
-
快速高效部署k8s高可用集群
一、安装组件准备 节点规划 HA(Keepalived+haproxy) 安装的服务器: 2. DOCKER CE安装包 这里用ansible进行对6个节点进行安装 3. 其他的R…
-
DEVOPS系列-部署DEVOPS一体化环境
一、环境介绍 下面环境部署集成在一台机器上 Jenkins JDK环境 Jenkins环境 Gitlab环境 Gitlab安装配置文件(基于docker-compose快速安装) …
-
DEVOPS系列–Gitlab的部署和参数设置
一、部署gitlab 1.基于docker-compose环境部署gitlab 2. 默认密码查看 3. 设置ssh-key 二、gitlab的使用 1.新建项目 创建后会得到一个…
-
Blog高可用实施(前端篇)
一 . 拓扑 二 .部署NGINX反向代理 部署过程 [root@ha-ng-1 ~]# hostanmectl set-hostname HA-NG-1 [root@ha-ng-…
-
Ansible之实施自动发布
前言 在一些比较大的IT公司是部署了很多的前端服务器,一套生产环境就可能有上几十台服务器,所以继续沿用人工发布的话会浪费时间和出错的概率,…
-
升级blog的一次记录
前言 升级之前是用docker的wordpress镜像,默认的网站协议是http(基于apache环境),非SSL的,想到现在的网站都是采用HTTPS SSL方式了,我觉得也需要升…
-
日志篇——部署ELK日志系统
一、安装准备 以下部署场景BASE docker-ce、docker-compose环境 导入镜像包 2. 新建文件夹 3. 修改一下logstash配置 cat logstash…
-
监控篇——部署Prometheus+Grafana
一、安装准备 以下部署场景BASE docker-ce、docker-compose环境 导入镜像包 2. 新建数据目录 二、安装部署 docker-compose配置 cat d…
-
BLOG DB实施主从
一、克隆原有的MySQL环境 二、移除克隆的从节点的mysql的auto.cnf文件(因为克隆出来的配置server-uuid相同会导致主从无法同步) [root@mysql-db…
-
监控篇——部署AlertManager+企业微信告警
一、安装准备 以下基于场景prometheus环境 下载安装包 2. 部署安装包 二、部署 1.修改alertmanager.yml配置 cat /usr/local/alertm…
